
Substrate
Inspect sheathing, framing, openings and moisture-sensitive transitions.
Exterior · Dallas–Fort Worth
Exterior materials and details that bring curb appeal and weather protection together.

What We Can Help With
Define the work your property needs, whether it is part of a complete build or a focused improvement.
Exterior materials and details that bring curb appeal and weather protection together. Early coordination with related trades helps clarify sequencing, access, and finish requirements before work begins.
For a useful exterior discussion, share: Elevations, material preferences, wall areas, and photos of existing conditions.
Answers To Help You Plan
The visible finish works with the weather-resistive barrier, flashings, drainage space, joints and clearances behind it. Specify those layers as one assembly. A finish replacement that leaves failed window transitions or concealed sheathing damage untouched may not address the water-entry path responsible for the original problem.
Inspect it before the exterior finish prevents access to laps, tapes, fasteners and opening transitions. Confirm that flashing directs water outward rather than into a concealed pocket. Photograph critical details and resolve damage or missing connections before masonry, stucco or siding covers the drainage plane.
Assign each interface in the scope rather than leaving neighboring trades to assume the other will finish it. Review roof-to-wall flashing, window pans and heads, penetrations and trim together. Installation order must preserve the drainage path, especially where later material would hide an incomplete transition.
Document the staining, swelling and previous repairs, then assess the adjacent openings, roof intersections and drainage. Selective removal may be needed to inspect framing and sheathing. Define both concealed repairs and the corrected water-management detail before choosing the replacement finish or closing the exposed wall.
Draw the material transitions, support conditions, movement joints, flashing and termination clearances before ordering trim. Coordinate finish thicknesses so changes in plane are intentional. Each selected system should follow its manufacturer’s details, with responsibility assigned for the connection between systems rather than relying on a final sealant bead.
Final soil, mulch, patios and walks must respect the clearances and drainage relationships of the selected wall assembly. Coordinate those elevations before exterior work is accepted. Do not let later landscaping cover weeps, bridge drainage spaces or redirect roof and surface runoff against the finished wall.
Licensed · Bonded · $5M Insured
Bring plans, a property address, or simply an idea. We’ll help you understand the next step.
Professional protection for residential and commercial work. No finished plans required.North Texas Field Note
Cladding, flashings, windows, penetrations, roof transitions and site drainage protect the building together.
Technical Execution Guide
Brick, stucco, siding, windows and flashings form one enclosure.
Inspect sheathing, framing, openings and moisture-sensitive transitions.
Lap and seal water-resistive layers, flashings and penetrations to drain outward.
Install ties, lath, furring, flashings, weeps and clearances for the chosen system.
Control masonry joints, stucco cure, siding fastening, trim and compatible sealants.
Inspect roof/wall intersections, openings, grade clearances and drainage paths.
Detailed Field Guide
Brick, stucco, stone veneer and siding are finish layers within a water-managed wall. The weather-resistive barrier, flashings, cavity, weeps, joints and grade clearances protect the structure behind the visible material.
Start With Existing Conditions
Assess sheathing, framing, existing moisture, window and door interfaces, roof-wall intersections, penetrations, grade and drainage. Probe or selective removal may be necessary when stains, swelling or prior sealant repairs suggest hidden damage.
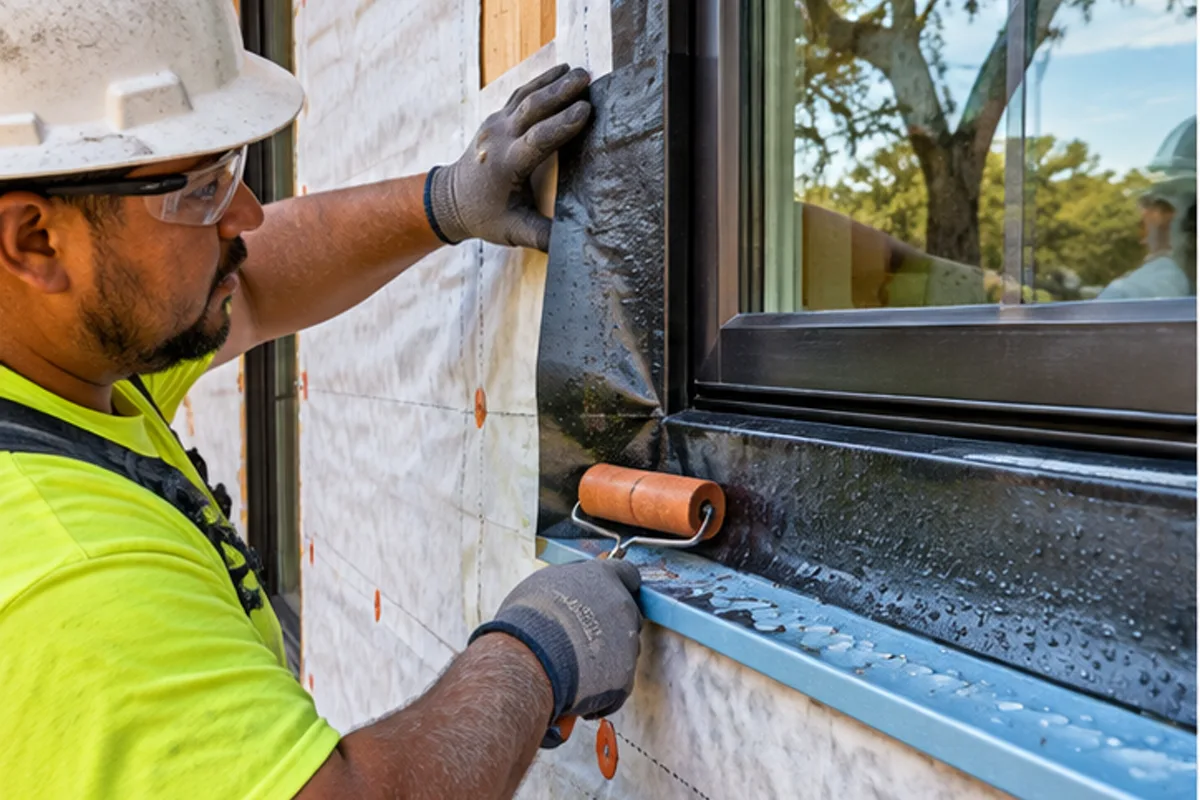
Define The Complete Assembly
Define WRB layers, tapes, pan/head flashing, masonry cavity, ties, lintels, weeps, lath, drainage mat, control joints, fasteners, trim, sealants and coating. Use manufacturer details for each selected assembly.
Coordinate The Adjacent Trades
Coordinate windows, doors, roofing, decks, utilities, fixtures, gutters, patios, landscape and interior air sealing. Establish which trade owns each transition rather than assuming sealant will bridge missing details.

Sequence The Work
Inspect the wall substrate and complete the drainage plane before cladding hides it. Integrate opening flashings and adjacent roof details, then install the selected masonry, siding or stucco assembly in its required sequence. Allow substrate cure where applicable and finish joints and coatings before final water-management checks.
Quality-Control Hold Points
Inspect WRB before cladding, flashing laps, fastener penetrations, tie spacing, weeps, joint locations, substrate cure and clearances. Water testing may be appropriate for complex or high-risk openings.
Cost Drivers And Allowances
Cost moves with removal, concealed sheathing repair, access, scaffolding, openings, mixed materials, detailing and finish. Separate square-foot field material from linear-foot edges, openings and transitions.
Schedule And Procurement
Open-wall exposure, substrate drying, stucco cure, masonry cleaning and coating temperatures affect sequence. Release windows and specialty trim early so the drainage plane can be completed once.